Isn't it the truth that the only resolutions that stick are the ones that are easy enough to repeat and easy enough to enjoy? If you haven't had the pleasure of keeping a sourdough starter and making a no-knead bread with it, you don't know what you're missing! You can make artisan bread very easily.
Most people are surprised when we tell them the culture that receives the most hesitation to try is our sourdough. Sure kefir is different and kombucha might look creepy, but sourdough holds the prize for intimidation. Baking is intimidating. Is it just me that finds using the oven for anything to be intimidating? But I'm here to tell you that sourdough is incredibly easy to care for (scoop of flour and water, stir, you're done for the week!) and baking with it is just as easy when you use a no-knead recipe.
I always tell people you can make baking as easy or difficult as you please. Sourdough bread is incredibly forgiving, and almost always delicious (even if it looks like a truck hit it!). You don't need anything out of the ordinary. Or any skills. Or loads of free time - I promise, sourdough does almost all of the work itself!
No-Knead Whole Spelt Sourdough (from Eric and Denyse, who are mentioned in the Lisa Rayner's Wild Bread )
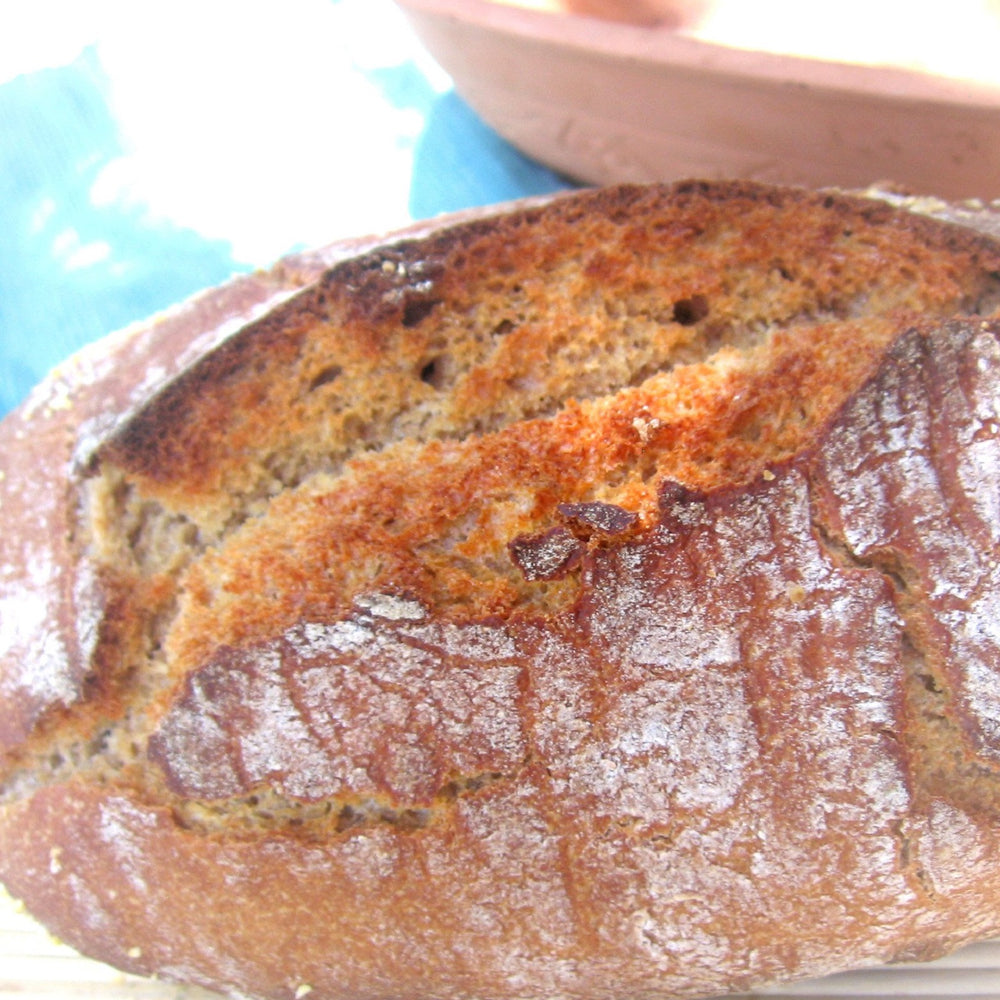
This is one of our favorites. Spelt is an ancient wheat grain that many people with wheat allergies or sensitivities can tolerate well. This grain is sometimes preferred to wheat because its less bitter and has a great flavor! It also gives beautiful 'open crumb' (airy bread with large bubbles inside)!)
The Ingredients:
- 1/4 cup sourdough starter
- 530 grams (about 5 cups well fluffed up) whole spelt flour
- 350 grams (1+1/2 cups) water
- 10 grams (1+1/2 tsp) salt
- 3 Tbs honey or sugar or 2 Tbs agave
Start in the evening the day before baking:
- Add water to mixing bowl, mix in the sweetener.
- Mix in the sourdough starter until relatively dissolved
- Mix in the flour (all 5 cups) for a minute or two until combined. Cover.
- This step is optional but can yield a better bread- let sit an hour, then come back and do 1 stretch and fold. To do this, you take the dough in your hands stretch it out, fold it over and pull from another direction and fold. If its sticky, give it a generous dusting of flour. You will want to do 2-3 more of these at 15 minute intervals, allowing the dough to rest and remain covered in between.
- Allow the dough to sit out overnight, covered. You can also do this recipe in the morning and put it directly in the fridge at this step, and take out before bed and let rise overnight, covered.
- The next morning, dust it, draw the dough together and pinch lightly underneath to form a nice ball (and round it according to the procedure given in the first recipe). Allow to rise on your final dusted baking sheet (lined with parchment) or whatever baking bowl or tin you will be using. Allow to proof/rise for about 1 to 1/2 hours, while pre-heating the oven.
- Bake at 450° for 45 minutes or until internal temp is 195-200°. You can bake in a covered baking dish (like a dutch oven, clay baker or La Cloche or open on a parchment lined-cookie sheet. You can also put it in basic bread loaf tins!
Comments
Mei Highfill
Does anyone know if the spelt can be replaced with white whole wheat or coarse whole wheat? Do they measure the same?
Thank you
M
May 03, 2018
Alex Parker
Hi Patricia. The temperature is in Fahrenheit.
March 09, 2017
Patricia Gregory
Good day. I’m new to baking. Could you tell me if the oven temp. Is centigrade. Thank you
March 09, 2017
Leave a comment